I’m excited to share with you how to deploy a PHP application using Coolify, a tool that has truly transformed my approach to application deployment. If you're like me and appreciate modern solutions that streamline the deployment process, you're in for a treat. Coolify is an open-source platform that simplifies the setup of applications, providing support for various environments including PHP, Node.js, and Python. What sets it apart is its user-friendly interface and built-in database management, making it feel less like a chore and more like an adventure.
Before diving into the nitty-gritty, let’s make sure you're prepped and ready. You’ll need a PHP application ready to go, a basic grasp of Docker and Git, and either a server to host yourself or a Coolify Cloud account. A domain name can enhance your production setup, but it's not mandatory.
Throughout this tutorial, I’ll guide you step-by-step, from installing Coolify to deploying your application seamlessly. I’ll also touch on crucial aspects like database setup and Docker configuration along the way. My aim is to make this journey as informative and engaging as possible, ensuring that you feel confident in managing your deployments. So, grab your favorite beverage, and let’s get started on deploying your PHP application with Coolify!
If you're looking for a modern, efficient way to deploy PHP applications with database integration, Coolify offers an excellent solution. This comprehensive guide will walk you through deploying your PHP script using Coolify, complete with database setup, Docker configuration, and production best practices.
What is Coolify?
Coolify is an open-source, self-hostable alternative to Heroku and Netlify that simplifies application deployment. It supports various environments, including PHP, Node.js, Python, and more, with built-in database management and automated deployment workflows.

Prerequisites
Before we begin, ensure you have:
- A PHP application ready for deployment
- Basic understanding of Docker and Git
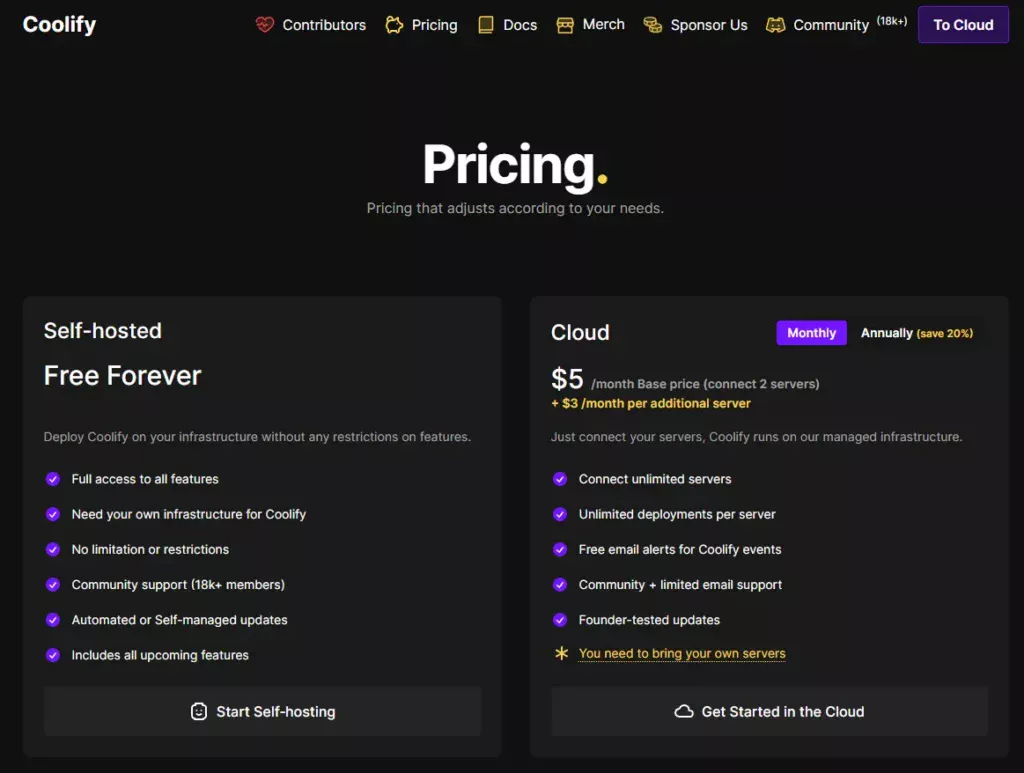
- A server (for self-hosted Coolify) or a Coolify Cloud account
- Domain name (optional but recommended for production)
How to Deploy a PHP Application with Coolify: A Complete Tutorial
Deploying a PHP application has never been easier! Check out our thorough tutorial on using Coolify to enhance your deployment strategy.
Step 1: Coolify Installation and Setup
Option A: Using Coolify Cloud (Recommended for Beginners)
- Visit Coolify Cloud
- Sign up for an account
- Verify your email address
- Access your dashboard immediately
Option B: Self-Hosted Installation
For those who prefer full control, install Coolify on your own server:
# Ensure you have a fresh Ubuntu 22.04 server
curl -fsSL https://cdn.coollabs.io/coolify/install.sh | sudo bash
Minimum Server Requirements:
- 2 CPU cores
- 2 GB RAM
- 30 GB storage
- Docker pre-installed
After installation, access Coolify at http://your-server-ip:8000 and immediately create your admin account.
Step 2: Prepare Your PHP Application for Deployment
Dockerize Your Application
Create a Dockerfile in your project root:
# Use a production-ready PHP image
FROM serversideup/php:8.3-fpm-nginx

# Enable OPcache for better performance
ENV PHP_OPCACHE_ENABLE=1
ENV PHP_OPCACHE_VALIDATE_TIMESTAMPS=0

# Switch to root for package installation
USER root

# Install Node.js for frontend builds (if needed)
RUN curl -sL https://deb.nodesource.com/setup_20.x | bash -
RUN apt-get install -y nodejs

# Copy application files
COPY --chown=www-data:www-data . /var/www/html

# Switch back to www-data for security
USER www-data

# Install Composer dependencies (if composer.json exists)
RUN if [ -f "composer.json" ]; then
    composer install --no-interaction --optimize-autoloader --no-dev;
    fi

# Build frontend assets (if package.json exists)
RUN if [ -f "package.json" ]; then
    npm install && npm run build;
    fi

# Set proper permissions for storage
RUN chmod -R 775 storage/ bootstrap/cache/
Create a .dockerignore File
.git/ node_modules/ vendor/ .env Dockerfile .dockerignore
Build and Push Your Docker Image
# Build the image
docker build -t yourusername/php-app:latest .

# Push to Docker Hub (or your preferred registry)
docker push yourusername/php-app:latest
Tip: Use a private repository for production applications by adding your registry credentials in Coolify.
Step 3: Database Setup in Coolify
Creating Your Database
- In your Coolify dashboard, click + New Resource
- Select your preferred database (MySQL, PostgreSQL, or MariaDB)
- Choose the same server where your application will deploy
- Note the automatically generated credentials:
- Database name
- Username
- Password
- Host (container name)
Database Configuration Tips
- Choose the right database: MySQL for most PHP applications, PostgreSQL for complex data relationships
- Set appropriate resource limits: Allocate sufficient CPU and memory based on expected load
- Enable backups: Configure automatic backups in the database settings
- Use connection pooling: For high-traffic applications, consider enabling connection pooling
Step 4: Application Deployment in Coolify
Create a New Application
- In Coolify, navigate to your project
- Click + Add Resource → Application
- Select Docker Compose as deployment method
Docker Compose Configuration
Use this template and customize for your application:
version: '3.8'

services:
  app:
    image: yourusername/php-app:latest
    container_name: php_application
    restart: unless-stopped
    working_dir: /var/www/html
    volumes:
      - php_storage:/var/www/html/storage
    environment:
      - PHP_OPCACHE_ENABLE=1
      - APP_ENV=production
      - APP_DEBUG=false
    networks:
      - coolify-network

volumes:
  php_storage:
    driver: local

networks:
  coolify-network:
    external: true
    name: ${COOLIFY_NETWORK_NAME}
Environment Variables Configuration
In Coolify's environment variables section, add:
# Application Settings
APP_NAME="Your PHP Application"
APP_ENV=production
APP_KEY=base64:your-generated-key-here
APP_DEBUG=false
APP_URL=https://your-domain.com

# Database Configuration
DB_CONNECTION=mysql
DB_HOST=your-database-container-name
DB_PORT=3306
DB_DATABASE=your_database_name
DB_USERNAME=your_database_user
DB_PASSWORD=your_database_password

# Additional Settings (if needed)
CACHE_DRIVER=redis
SESSION_DRIVER=redis
QUEUE_CONNECTION=redis

# Redis Configuration (if using)
REDIS_HOST=redis-container-name
REDIS_PASSWORD=null
REDIS_PORT=6379
Important: Use the actual database container name as the DB_HOST, not localhost or 127.0.0.1.
Domain and SSL Configuration
- Add your domain in the Domain section
- Coolify will automatically provision SSL certificates via Let's Encrypt
- Set the port to
8080for ServersideUp PHP images - Enable HTTP/2 and HTTP/3 for better performance
Step 5: Post-Deployment Configuration
File Permissions Fix
PHP applications often need specific file permissions. Use Coolify's Command Center to fix permissions:
# Set proper ownership
chown -R www-data:www-data /var/www/html/storage
chown -R www-data:www/data /var/www/html/bootstrap/cache

# Set correct permissions
chmod -R 775 /var/www/html/storage
chmod -R 775 /var/www/html/bootstrap/cache
Database Migrations and Seeding
For frameworks like Laravel, add post-deployment commands:
# Run migrations
php artisan migrate --force

# Seed database (if needed)
php artisan db:seed --force

# Cache configuration and routes
php artisan config:cache
php artisan route:cache
php artisan view:cache

# Link storage if using Laravel
php artisan storage:link
Monitoring and Logs
- Use Coolify's built-in log viewer to monitor application logs
- Set up health checks to ensure your application is running properly
- Configure alerts for critical errors or downtime
Step 6: Advanced Configuration
Redis Setup for Caching and Sessions
- Add a Redis service in Coolify
- Update your environment variables:
CACHE_DRIVER=redis
SESSION_DRIVER=redis
QUEUE_CONNECTION=redis
REDIS_HOST=your-redis-container-name
REDIS_PASSWORD=null
REDIS_PORT=6379
Queue Workers
For applications using job queues, add a separate service in your Docker Compose:
queue_worker:
  image: yourusername/php-app:latest
  command: php artisan queue:work --sleep=3 --tries=3
  restart: unless-stopped
  networks:
    - coolify-network
  depends_on:
    - app
Cron Jobs
Schedule tasks using Coolify's Scheduled Commands:
# Run every minute
php artisan schedule:run

# Daily database backups
php artisan backup:run
Step 7: Backup Strategy
Database Backups
- In your database service settings, configure backups
- Choose backup frequency (daily, weekly, monthly)
- Select storage destination (local, S3, or other cloud storage)
- Test restoration process regularly
Application Backups
Although your code should be in version control, backup important files:
- User uploads (store in persistent volumes)
- Environment-specific configuration
- SSL certificates
Troubleshooting Common Issues
“Directory not writable” Errors
# Fix permissions via Command Center
chown -R www-data:www-data /var/www/html/storage
chmod -R 775 /var/www/html/storage
Database Connection Issues
- Verify the database container name is correct in environment variables
- Check if the database service is running
- Ensure both services are on the same network
Performance Problems
- Enable OPcache in your PHP configuration
- Implement Redis for caching and sessions
- Use CDN for static assets
- Optimize your database queries and indexes
Security Best Practices
- Use private Docker repositories for production images
- Regularly update your base Docker images and dependencies
- Implement HTTPS and force SSL redirects
- Use strong database passwords and limit connection sources
- Regularly review logs for suspicious activities
- Implement rate limiting for API endpoints
- Keep Coolify updated to the latest version
Monitoring and Maintenance
Regular Checks
- Monitor resource usage (CPU, memory, disk space)
- Review application and database logs
- Test backup restoration periodically
- Update dependencies and security patches
Performance Optimization
- Implement caching at multiple levels (OPcache, Redis, CDN)
- Optimize images and static assets
- Use database indexing and query optimization
- Implement lazy loading where appropriate

Conclusion
Deploying PHP applications with Coolify provides a robust, scalable solution that combines ease of use with powerful features. By following this guide, you've learned how to:
- Set up Coolify (cloud or self-hosted)
- Dockerize your PHP application
- Configure and link databases
- Deploy with proper environment configuration
- Implement advanced features like queues and caching
- Maintain and secure your deployment
Coolify's intuitive interface and powerful capabilities make it an excellent choice for developers looking to streamline their deployment process without sacrificing control or flexibility.
Remember that each application is unique, so adjust these guidelines based on your specific requirements. Happy deploying!
Additional Resources:
Need Help?
- Join the Coolify Discord community
- Check the Coolify GitHub repository for issues and discussions


